Showing posts with label Copic Markers. Show all posts
Thursday, July 10, 2014
Teacher Appreciation Cards: You Are Awesum
Here's a thank you note for my son's math teacher.
Lots of product from different manufacturers was used.
chalk board - Lawn Fawn; writing on chalk board - Hero Arts; sentiment - Paper Smooches; girl - MFT; Copic Markers.
Thanks for visiting.
Teacher Appreciation Cards: With Gratitude
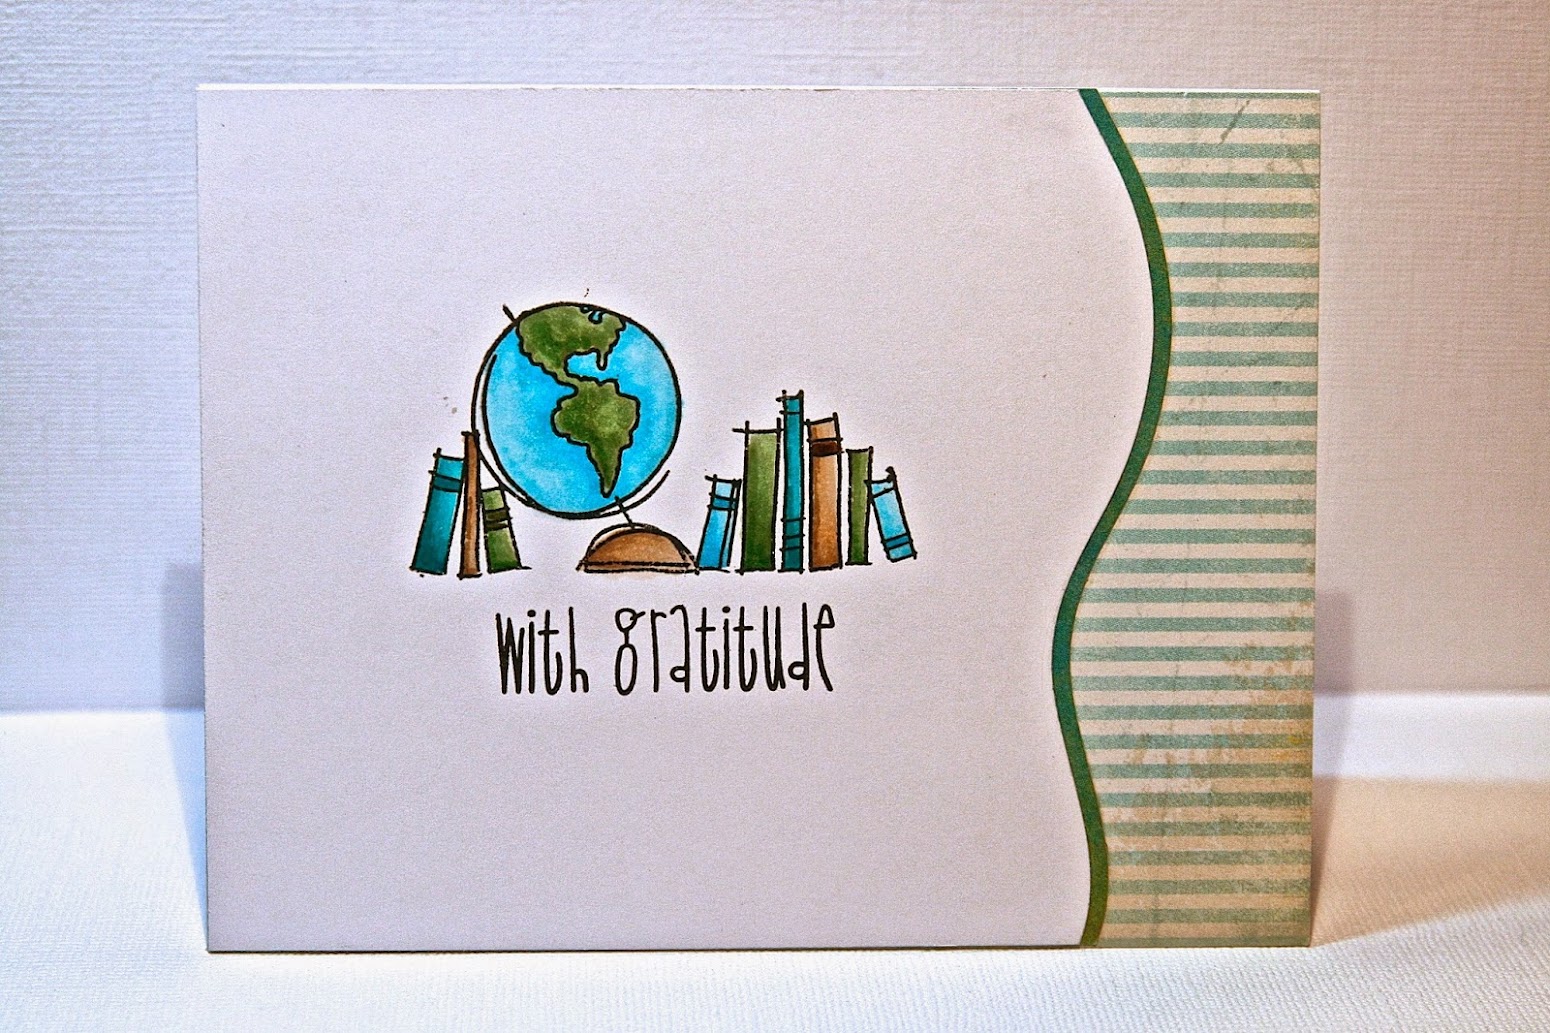
Another teacher thank you card. This one was given to my son's Social Studies teacher.
The image is from Stampendous but it is so old, I can't even tell you the name. It's still a favorite. The sentiment is Many Thanks from Paper Smooches and can be found at Ellen Hutson, LLC. Copic Markers were used.
Thanks for visiting.
Friday, May 23, 2014
Mother's Day
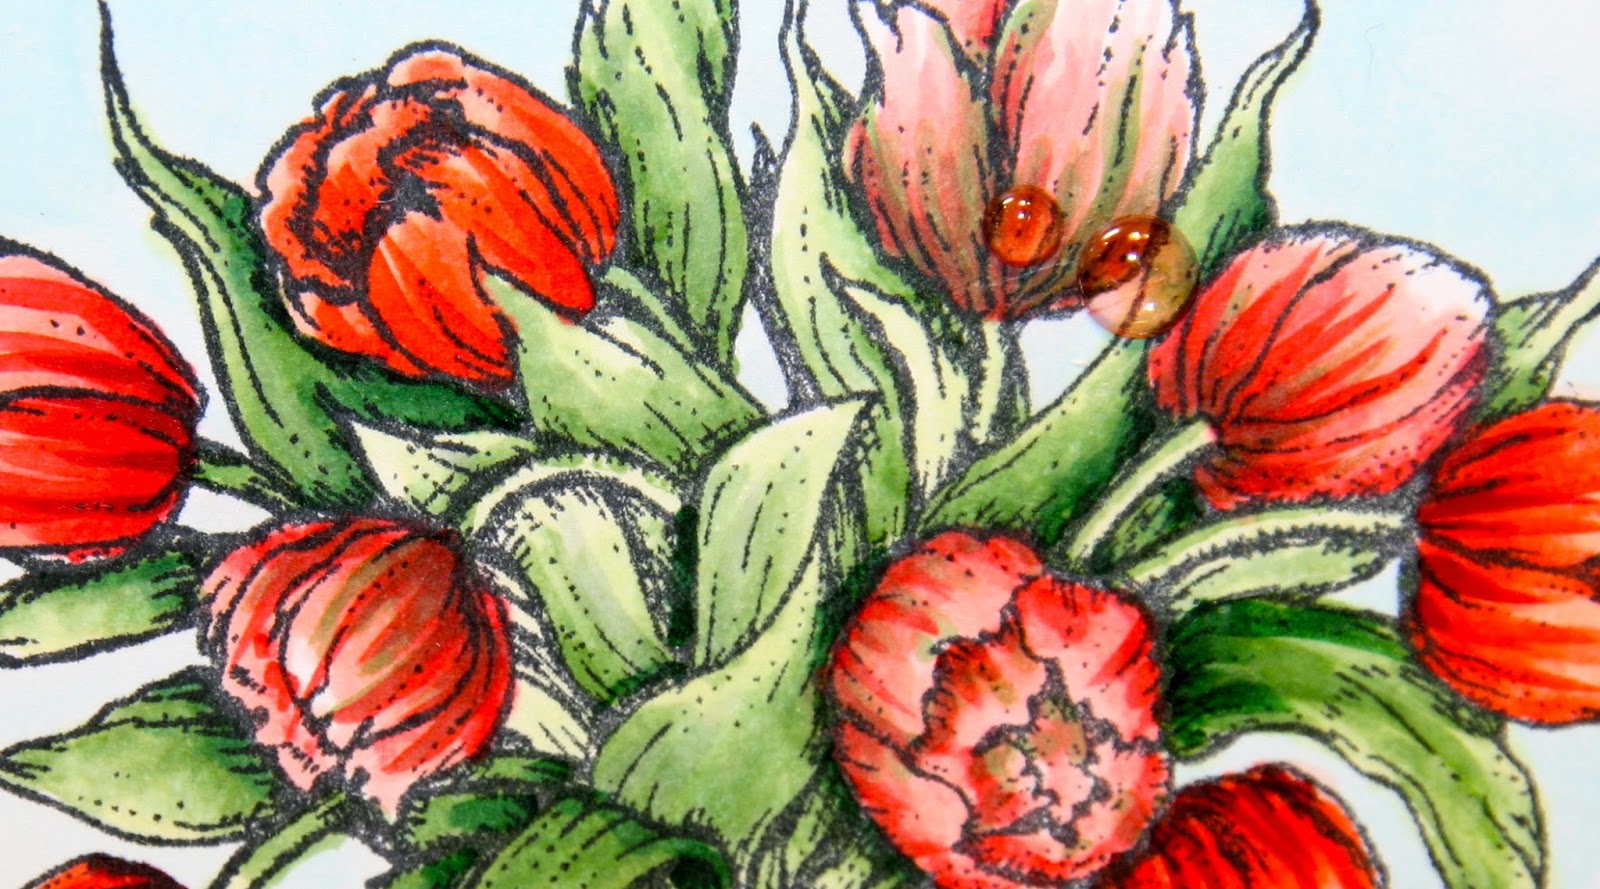
A little late, but here is the card I made for my mother for Mother's Day. I was inspired by her beautiful garden that is filled with Spring-blooming bulbs. The Copic colored image is from Flourishes.
Thanks for visiting.
Saturday, April 26, 2014
It's A Good Day To Be Happy
Two cards in one month, it feels so good to get crafty again. There's something about it that cleanses the soul and makes everything ok, if only for a little while. It's a good day to be happy.
Even though I haven't been able to do much crafting this past year, I still somehow managed to buy lots of incredible products from my favorite companies, and of course, always with the best of intentions of finding the time to use them. I'm so glad I finally got the chance. This card is for my Dad's birthday.
I created my cloud masks by using the MFT Cloud Cover-Up Die-namics die. After running the die through my Big Shot, I adhered some of the clouds to a white panel using repositional tape and inked around them using Tsukineko Memento Summer Sky dye ink. Next, I removed the clouds and stamped the balloons and sentiment from this adorable Mama Elephant Up and Away clear stamp set. On a separate piece of Copic X-Press It paper, I stamped the balloon set again and the monkey. I used the coordinating Mama Elephant Creative Cuts dies on both the balloons and the monkey and then colored the images with my Copics (W0,W1, E40, E42, R00, B0000, B00, B01, B02, B04, B06, YG00, YG01, YG13, YG17). To assemble the card, I adhered the balloons and then used foam dimensional squares to adhere the monkey and a few of the leftover Cloud Cover-Up clouds. I stamped "Sending Birthday Hugs" on the inside, creating the sentiment from the Lawn Fawn So Much To Say clear stamp set.
I'm entering this card in this week's Cute Card Thursday Challenge, #318 Blue & Green
Thanks for stopping by and checking out my card.
Happy Birthday Dad! I love you.
Wednesday, April 10, 2013
Chick Tower
Here's a quick card created with the Chick Tower image by Hambo Stamps. I just love this stamp. Actually, I love all Hambo stamps, great quality, cute designs. The paper is My Mind's Eye "Hip-Hooray"
Thanks for visiting. Have a great day!
Monday, April 8, 2013
Butterfly Lamp
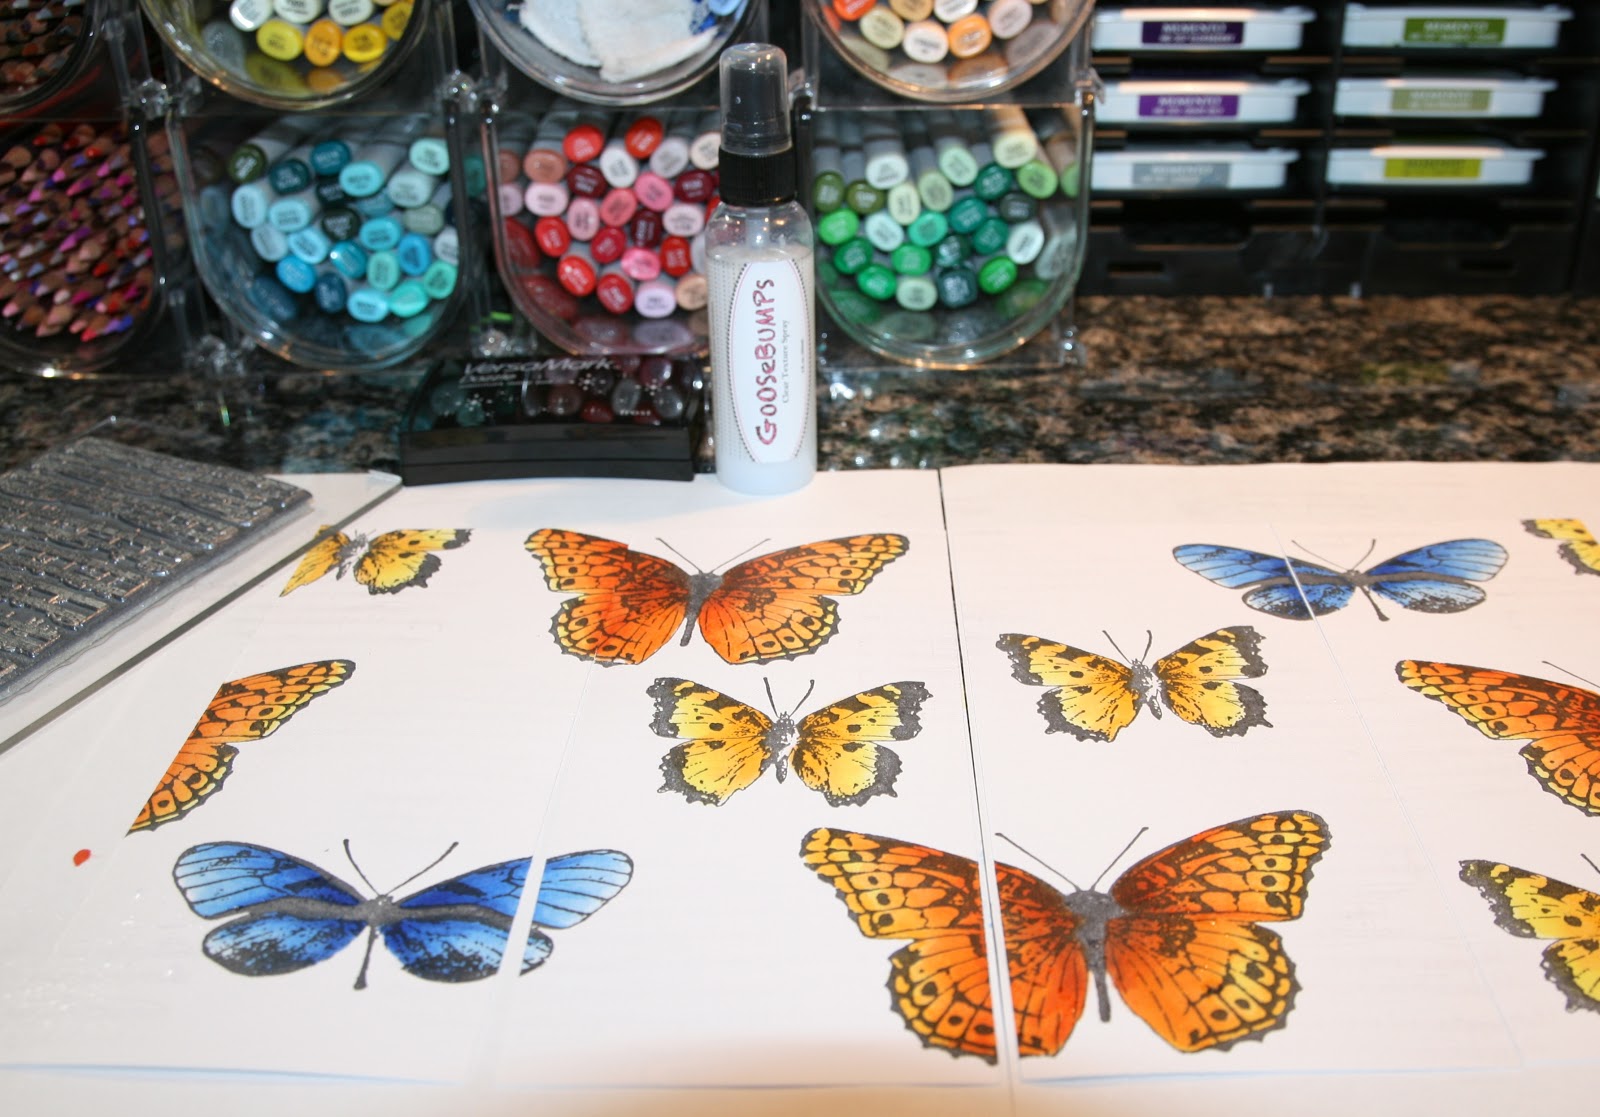
Something new today (at least to me)...the Paper Fusion Creative Lamp kit. While at Dick Blick's, I came across these kits and had to try making one. These kits scream Stampendous Jumbo Cling stamps. I decided to use the Butterfly Trio.

I stamped the butterflies on the included panels, using Tsukineko Memento Tuxedo Black ink.

After coloring the butterflies with my Copic Markers, I stamped the Stampendous Music Score background in the whitespace. I used Tsukineko VersaMark Dazzle in Frost to give it a little sparkle and then spritzed the panels with Tsukineko Goosebumps.

I then inked the panels with Memento Summer Sky to bring out the Music Score image and the Goosebumps. I also stamped a flourish from the Stampendous Daisy Thanks set, also with the Summer Sky ink.

The lamp was easy to assemble. If I were to make another one, I would sand the frame and give it a gloss coat before putting it altogether but this was a fun project. Because these kits come in different sizes, I see a cluster of them on a side table, maybe with a different Stampendous Jumbo flower on each one.


Thanks for visiting!
I stamped the butterflies on the included panels, using Tsukineko Memento Tuxedo Black ink.
After coloring the butterflies with my Copic Markers, I stamped the Stampendous Music Score background in the whitespace. I used Tsukineko VersaMark Dazzle in Frost to give it a little sparkle and then spritzed the panels with Tsukineko Goosebumps.
I then inked the panels with Memento Summer Sky to bring out the Music Score image and the Goosebumps. I also stamped a flourish from the Stampendous Daisy Thanks set, also with the Summer Sky ink.
The lamp was easy to assemble. If I were to make another one, I would sand the frame and give it a gloss coat before putting it altogether but this was a fun project. Because these kits come in different sizes, I see a cluster of them on a side table, maybe with a different Stampendous Jumbo flower on each one.
Thanks for visiting!
Thursday, March 14, 2013
Happy Pi Day!
It's my son's favorite holiday...well, OK, his third favorite after his birthday and Christmas. Today is Pi Day. He asked if I would make a card for his math teacher. How could I say no?
First, I stamped the actual number onto cardstock using Lawn Fawn's Quinn's 123s and Aquamarine Archival ink. I then stamped the birds and word bubbles from the Lawn Fawn A Birdie Told Me set. Lawn Fawn just released a coordinating bunch of dies called Lawn Cuts so it took no time at all to assemble my card. I used Harold's ABCs (another Lawn Fawn set) to stamp 'Happy' and 'Day'. As for the Pi symbol, I got lucky. There She Goes Clear Stamps has an adorable set called Cutie Pi. The sentiment actually said You're a cutie Pi but I trimmed off the words. I colored with my Copics and then added some texture to my symbol using the Lawn Fawn Belinda's Borders set. Voila, a Happy Pi Day card. I thinks this calls for pie.
Thanks for visiting.
Sunday, February 17, 2013
Ruff Day?
My dad has been feeling a little under the weather lately so I thought I'd send a card to let him know I'm thinking of him. This new Stampendous Cling Doctor Kiddo is perfect. I stamped the image onto Copic X-Press It Blending Card and colored it with my Copic markers. I created the sentiment on my computer. The background panels were made using My Mind's Eye Blink of an Eye patterned paper. A button, jute and some tulle and my card is done. You can check out all of the new Stampendous products here.
Thanks for visiting and for your kind comments!
Wednesday, January 30, 2013
Another New Stampendous Floral
Today, I'm sharing a card featuring this brand new Stampendous floral image, Seed Catalog. Here's a quick supply list and directions:
Stampendous CRR161 Seed Catalog
Bazzill Cardstock
Copic X-Press It Blending Card
Tsukineko Memento Tuxedo Black Ink
Copic Markers
May Arts Ribbon
Create card base and panel.
Stamp Seed Catalog onto X-Press It Blending Card using Tuxedo Black ink; Color with Copics.
Adhere to panel and card base; Twist and attach ribbon.
Thanks for visiting!
Monday, January 28, 2013
Another Stampendous Challenge Card, Another New Kiddo
I just love catalog release time! The new Stampendous products are fantastic! Here is a little itty bitty card that uses the new Kiddo Birthday stamp set. This set has both a cute boy and girl kiddo and lots of little extras like the banner, table, cake and presents I used in my card. Stampendous also just released micro glitter in the most delicious colors. I coated brads in Glossy Accents and dipped them in the new Lime Micro Glitter. Look for these cool new Stampendous products in a store near you. They should be showing up any day now. Here are the details:
Noteworthy Supplies and Directions:
Stampendous SSC1164 Kiddo Birthday
Stampendous MG08 Lime Micro Glitter
Little Yellow Bicycle Patterned Paper
Bazzill Cardstock
Copic X-Press It Blending Card
Tsukineko Memento Tuxedo Black Ink
Copic Markers
Spellbinders Lacy Squares Dies
Ranger Glossy Accents
Brads
Stamp boy and banner on X-Press It Blending Card; Color with Copics; Fussy-cut.
Stamp table with cake and presents on patterned paper panel; Color with Copics.
Create card base by die cutting two Lacy Squares; Adhere together.
Coat two brads with Glossy Accents; Dip in Lime Micro Glitter; Seal with more Glossy Accents.
Create mat for patterned paper panel; Adhere to panel; Punch holes and add glittered brads.
Attach colored images.
Adhere everything to card base.
There are a few more days to play in the Stampendous Kiddos Challenge. I'm going to be adding this one. Check out all of the details here.
Thanks for visiting!
Wednesday, January 23, 2013
More New Stampendous...This One's for My Mum
No one does flowers like Stampendous! I first fell in love with this company because of their beautiful flower stamps. They offer something for everyone with their Cling Jumbos and their Perfectly Clear Flower images, all of which are fun to stamp, color and/or emboss. New Stampendous florals will be arriving in stores in the next few weeks and I promise, you are going to love them.
Today's card uses the new Cling Sweet Pea stamp. You'll be seeing me use this one a lot. I love sweet peas. My grandma grew sweet peas from seeds that she collected from her relatives. My mum was smart and saved some of these very seeds and grows beautiful sweet peas every year. I don't know who loves them more - my mum or me? I do know sweet peas make me happy. This one's for you, Mum xoxo.
Noteworthy Supplies and Directions:
Stampendous CRP189 Cling Sweet Pea
Bazzill Cardstock
Copic X-Press It Blending Card
Tsukineko Memento Tuxedo Black Ink
Copic Markers
May Arts Ribbon
May Arts Twine
Button
Create card base and panels.
Stamp Sweet Pea onto X-Press It Blending Card; Color with Copics.
Wrap ribbon around larger panels; Adhere to card base.
Add tulle; Adhere remaining panels.
Finish by threading button with twine; Attach to card base.
Thank you so much for visiting!
New Kiddos at Stampendous
There's still time to enter this month's Stampendous Challenge which is all about Kiddos. If you're new to Kiddos, it's an adorable line of stamps showcasing really cute kid images doing all kinds of fun activities (bike riding, fishing, skate boarding, dancing, celebrating birthdays...). Kiddos are so much fun to stamp and color.
Have I peeked your curiosity? Want to play along? Stamp your favorite Stampendous Kiddos on any type of project and link it to the linky tool below for your chance to win a Kiddo of your own! You can use other cute kid stamps you already own, but Stampendous Kiddos on your project make it count twice. Please note: to be eligible to win, you need a U.S. Mailing address. You can read all our official rules here on our Challenge Rules Page.
Today's card uses the new Stampendous Boots Kiddo. Yes, that's right, it's brand new. All this week, design team members are showcasing the newest and coolest, soon to be released products and this cutie is one of them.
Noteworthy Supplies and Directions:
Stampendous CRM292 Cling Boots Kiddo
Stampendous SSC1164 Kiddo Birthday
Stampendous CRR105 Dream Text
Bazzill Cardstock
Neenah Desert Storm Cardstock
Patterned Paper
Copic X-Press It Blending Card
Tsukineko Memento Tuxedo Black Ink
Tsukineko VersaMark WaterMark Ink
Clearsnap Colorbox Frost White Ink
Copic Markers
Twine
Create card base and corresponding panels from various colors of cardstock; Swipe panel edges with Frost White ink.
Create decorative edge on top panel by punching small holes with a paper piercer.
Stamp Dream Text onto top panel using VersaMark ink.
Adhere panels together; Wrap twine around panels; Adhere to card base.
Punch several circles varying in size from cardstock and patterned paper; Swipe edges with Frost White ink;
Cut slits in circles to create frills.
Stamp sentiment onto one circle using Tuxedo Black ink.
Layer circles; Adhere to card base.
Stamp Boots Kiddo onto X-Press It Blending Card using Tuxedo Black ink; Color with Copics.
Create decorative edge around image.
Adhere colored image panel to mat and then card base.
Are you having fun and want to see more? Please visit my fellow design team members' blogs. You can find links along my sidebar. Thanks for visiting!
Tuesday, January 22, 2013
Stampendous Sneak Peeks From All of Us
All this week, the Stampendous Design team is sharing projects using new CHA-showcased, Stampendous products. That's right, coming to a store near you, new stamps, color fragments, mica fragments and micro glitter. Look for the new products in the next few weeks.
My card uses the new On the Farm stamp set and new Hot Lime color fragments along with a sentiment from the Stampendous Birthday Assortment set and my favorite Sage and Leaf Green color fragments.
Noteworthy Supplies and Directions:
Stampendous SSC1162 On The Farm
Stampendous SSC1115 Birthday Assortment
Stampendous FRC20 Hot Lime Color Fragments
Stampendous FRC02 Sage Green Color Fragments
Stampendous FRC13 Leaf Green Color Fragments
Bazzill Cardstock
Neenah Desert Storm
Copic X-Press It Blending Card
Tsukineko Memento Tuxedo Black Ink
Copic Markers
May Arts Twine
Button
Create scene by stamping and masking various images from the On The Farm set onto X-Press It Blending Card using Tuxedo Black ink; Color with Copic Markers.
Adhere to green mat and card base.
Stamp sentiment from Birthday Assortment set onto white cardstock; Mat and adhere to card base.
Mix together small amounts of Hot Lime, Sage and Leaf Color Fragments.
Add liquid glue to random grassy areas; sprinkle with Color Fragments.
Thread button with twine; Adhere to card.
Please visit my teammates' blogs to see their amazing creations. You can find all of their links on the right side of my blog. Thanks for visiting!
Wednesday, January 9, 2013
Got Worms?
I had a few minutes today so I thought I'd play along with this month's Stampendous Challenge. The theme is Sweet Kiddos. For all of the challenge details, please check out the new Challenge Page on the Stampendous Impressions blog. It would be great if you played along too.
I used the Stampendous Fishing Kiddo stamp, colored with Copic Markers. After coloring, I added some more texture to the image by crunching some Stampendous Color Fragments and adhering them to the grassy areas. My sentiment was stamped with the Stampendous Small Typewriter Alphabet. Some patterned paper (We R Memory Keepers & Echo Park), a wooden bead for a bobber and netting from some fresh produce and the card is done.
Thanks for visiting!
Noteworthy Supplies:
Thursday, January 3, 2013
A New Year, A New Stampendous Challenge
It's a new year and a new month so that means a new Stampendous challenge. You're going to love this one. The theme is Sweet Kiddos. Stampendous has the most adorable collection of kid stamps, called kiddos. They are so much fun to color and are perfect for so many different occasions.
My card today features these very cute Kissin' Kiddos. Valentine's Day will be here before you know it. This stamp would be perfect for school valentine's parties.
Supplies:
Stampendous Kissin Kiddos
Stampendous Small Typewriter Alphabet
Stampendous Stardust Embossing Powder
Tsukineko Memento Tuxedo Black Ink
Copic Markers
Copic X-Press It Blending Card
American Crafts Love, Can’t Help Falling patterned paper
Canvas Corp Red & Ivory Mini Dot Reverse patterned paper
May Arts Jute
Button
Cricut Doodlecharms Cartridge
EK Success Tag Punch
Directions:
Create card base and mat from patterned paper.
Stamp image on X-Press It Blending Card; Color with Copics.
Apply Stampendous Stardust embossing powder to flowers, polka dots and hair band; Heat set.
Cut one heart and one scalloped heart using Cricut and X-Press It Blending Card; Color with Copics.
Stamp sentiment on X-Press It Blending Card; Create tag using punch.
String button with jute.
Assemble card.
Let’s see what you can do with them! Stamp your favorite Stampendous Kiddos on any type of project and link it to the following linky tool for your chance to win a Kiddo of your own! (yes...you can use other cute kid stamps you already own, but Stampendous Kiddos on your project make it count twice!)(and yes, winners still need a U.S. Mailing address.
Thanks for visiting!
Wednesday, December 5, 2012
Happy International Ninja Day!
Today is International Ninja Day. I'm not sure what that means but may it be good for you!
My son loves ninjas. Lego Ninjago is his favorite TV show and yes, our house has been over-taken by the little lego ninjago dudes and their vehicles. My son just can't get enough. He loves ninjas so much that he's dressed as a ninja several Halloweens in a row. Ninjas are the coolest!
So recently when I discovered this incredible stamp set from There She Goes Stamps, I knew I had to buy it. It's called Ninja Skillz and it is fantastic! It comes with several stinkin' cute ninja images and loads of sentiments. For my very quick card (it was 1:30am before I realized what day it is), I actually cut a sentiment apart. It should say "It's your birthday. Celebrate like a ninja!" but the celebrate part is so perfect for today's holiday.
I had so much fun at the Ninja Skillz Release Blog Hop, that I ordered the set immediately. Within just a few days, my ninja stamps showed up at my door...and this was the beginning of my newest love affair. There She Goes Stamps are amazing! I love the quality, they stamp perfectly and give you a really crisp image. YAY! And then there's the designs, lots and lots of super cute, extremely colorable images. I'm in coloring heaven.
There you have it. Quick, excellent service, high-quality stamps and loads of coloring potential. I can't think of a better way to spend International Ninja Day than to be coloring some. Thanks There She Goes Stamps.
Thanks for visiting and have a very happy Ninja Day!
Friday, October 19, 2012
A Little Sparkle
Here's a quick share, a card I made by 'watercoloring' with my Copics. After stamping this beautiful Stampendous Amaryllis image onto Neenah Classic Crest White cardstock, I pulled out my Copic refill bottles and a water brush. I've been wanting to try this technique for a while and I'm so glad I did. It's an easy way to achieve a 'watercolored' effect.
Here's how:
I used an inexpensive, plastic plate as my palette. After pouring a little bit of each desired refill color onto the plate, I filled my water brush with Copic Colorless Blender. I used the water brush to pick up the color and basically 'painted' the flower image. After I finished, I smeared the whole panel with VersaMark WaterMark ink and sprinkled it with Stampendous Kaleidoscope Embossing Powder. I used my heat tool to melt the powder, added a bow and attached it to a card base. Another simple but sparkly holiday card.
I'm going to add this one to this month's Stampendous Challenge. The theme is Fabulous Florals. Have you played along yet? Come on, you know you want to. There are prizes to be had. Please click here for all of the details.
Thanks for visiting.
Noteworthy Supplies:
Thursday, October 11, 2012
Another Great Collaboration
Stampendous has teamed up with another incredible company. All this week, we are playing along with Core'dinations. It's been great fun so far. Please remember to stop back on Saturday for a show-stopping, grand finale blog hop.
I created a card using the Stampendous Cling Jumbo Dahlia stamp and Core'dinations Black Magic ColorCore cardstock. I started by stamping the flourish from the Cling Jumbo Dahlia on the purple back side of a piece of Black Magic cardstock. I then 'embossed' this flourish by once again placing the stamped image side up, black side down on a foam mat and then tracing the flourish with a stylus. I turned the cardstock over so the black side was up and sanded over the raised areas. Here's the magic, the purple color shows through where sanded.
The glorious dahlia image was stamped onto Copic X-Press It Blending Card and colored with Copic markers. I cut out the image and then adhered it to the card. Simple, easy and fun.
And now for more inspiration.
(That's me)
Thanks for visiting today. Have a magical day!
Noteworthy Supplies:
Copic Colors: V000/V01/V04/C1
Wednesday, October 10, 2012
A Very Sparkly Christmas
I LOVE the festive look at Christmas, the twinkling lights, the shiny ornaments and the glittery cards. I LOVE sparkle. There's been a big trend lately to color over glitter. I'd like to share a card that gives you that sparkly look only it uses a completely different technique with embossing powder.
I started by stamping the Stampendous Cling Jumbo Poinsettia* onto Copic X-Press It Blending Card using Memento Tuxedo Black Ink. I colored this stunning image and then cut around it. Using a direct-to-paper technique, I inked my poinsettia with VersaMark WaterMark ink and then covered it with Stampendous Kaleidoscope Embossing Powder. Heat setting the embossing powder locks all of that glittery goodness in place so it stays on your card and not all over your hands (and the counter and the floor and...). I absolutely LOVE this particular Stampendous powder. It picks up whatever colors you use underneath it. You can even create a fun, Mercury Glass look with it.
I created the background panel by stamping the Stampendous Christmas Background onto white cardstock. I then placed the Crafter's Workshop 6x6 Mini Cosmic Swirl Stencil over the stamped panel and inked using Ranger Evergreen Bough and Iced Spruce Distress Inks. I sprinkled the panel with water, heat set it and then adhered it to a card base. After attaching my sparkly poinsettia, my card was complete.
*A note about the Cling Jumbo Poinsettia: This has been such a popular stamp that it is sold out at the Stampendous Online Store. It may still be available at your local retailer. For Central Ohioans, Scrapbook Art in Lewis Center still has a few in stock.
Thanks for visiting. May your day be filled with sparkle.
Noteworthy Supplies:
Subscribe to:
Posts (Atom)